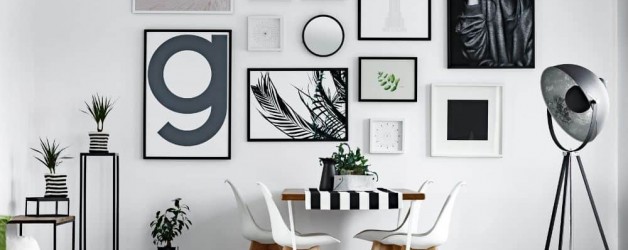
Gallery walls make a beautiful addition to any space. They allow you to showcase your unique taste while enhancing the visual intrigue of your walls. If you’ve never created a gallery wall before, doing so for the first time can be a little intimidating. To help you get started, here are some essential steps to creating the perfect gallery wall.
Determine the style of gallery wall you want
The first step to creating the perfect gallery wall is determining the style of you wish to have. Here are some of the many different gallery wall styles and layouts to choose from:
- Salon style: A floor-to-ceiling arrangement of artwork in frames of various sizes.
- Grid/symmetrical style: Identically sized frames are symmetrically positioned and evenly aligned on the top, bottom, and both sides of the arrangement.
- Top-aligned: The artwork in the gallery wall is aligned at the top and has different levels at the bottom.
- Bottom-aligned: The artwork is aligned at the bottom and arranged at different levels at the top.
Carefully consider framing
In addition to the art itself, the frames you choose will largely affect the appearance of a gallery wall. If your gallery wall consists of various artwork with differing themes, consider using frames with similar designs to give your wall a more cohesive look. If your artwork is all very uniform, consider using frames with unique styles to add more intrigue. Whatever frame style you choose, it’s important not to underestimate the influence framing can have on the look of your gallery wall.
Create templates
Before you start hammering into your wall, create a template using the exact sizes of all the pieces you’re hanging. An easy way to do so is by tracing the size of each painting onto craft paper or newspaper and cutting out the shapes. Then, position the paper cutouts onto your wall and hang them using masking tape. By doing so, you can visualize how your gallery wall will look and easily rearrange the positioning before committing to a layout.
Ensure your artwork stays perfectly aligned
Using the right hanging materials and methods will prevent the artwork on your gallery wall from being crooked. A useful tool for easily aligning your artwork is a Hang It Perfect tool, which will ensure your artwork is level before you hang it up. To avoid having to constantly readjust your artwork to keep it even, you could also consider using D-rings rather than wire or string to hang your art. You’ll need two hooks per art piece rather than one, but using D-rings will ensure your artwork stays perfectly aligned over time.
For breathtaking frames that will greatly enhance the appearance of your gallery wall, shop AUM Framing & Gallery. We’ve been creating exceptional custom frames in Denver, Colorado, for over 35 years. Thanks to our highly qualified staff of framing professionals, our craftsmanship and quality is truly unparalleled. In addition to custom framing, we also offer canvas stretching services, framing repair and restoration, art sourcing, and other services that will make your gallery wall a success. For more information regarding our services, contact us today.

